Author Archives: James Keppel

VS2017RC Tooling on Linux

What better way to try out VS2017 RC, by creating a .Net Core solution on windows, and building it on linux.

However the standard .Net core installation guide for Linux, as of the date of this post, will not build VS2017 RC projects, due to it utilising *.csproj files, and no longer creating xproj / project.json files.

Expect an error along the lines of:

[user@localhost]$ dotnet run
The current project is not valid because of the following errors:
/home/user/DotNetCoreASP(1,0): error DOTNET1017: Project file does not exist '/home/user/DotNetCoreASP/project.json'.

A version check will show that the "latest" is quite on the bleeding edge as it needs to be.

[user@localhost /opt/dotnet]$ dotnet --version
1.0.0-preview2-1-003177

Compare this to Powershell after a VS2017 .Net Core install in the windows box.

PS C:\> dotnet --version
1.0.0-preview3-004056

Initially, the only option looked to be building from the preview branch in git.

However, there is a series of preview binaries available for those looking to hit the ground running faster.

https://github.com/dotnet/core/blob/master/release-notes/preview3-download.md

Howover, that is waye tyopo easy.

Building the .Net CLI in Linux

Let's build us the .Net CLI.

After a git clone, switch to the preview 3 branch.

git checkout -b re1/1.0.0.0-preview3

Initally, it's going to take a while, the bash that kicks it all off is  /build.sh

The scripts go three to four deep ,at least. Adding a set -x to the top level script next to the existing set -e will give us some visibility into how the build is going.

#!/usr/bin/env bash
#
# Copyright (c) .NET Foundation and contributors. All rights reserved.
# Licensed under the MIT license. See LICENSE file in the project root for full license information.
#

# Set OFFLINE environment variable to build offline

set -e
# Enable recursive debugging for verbose output
set -x

SOURCE="${BASH_SOURCE[0]}"
...

Post Build

Once built set up a new symlink. As it will be to the same executable, dotnet, create it in a subfolder to /user/local/bin, and then remove it, and remove the folder.

sudo mkdir /usr/local/bin/dotnet-preview3-dir
sudo ln -s /home/user/dev/cli/artifacts/centos.7-x64/stage2/dotnet /usr/local/bin/dotnet-preview3-dir
sudo mv /usr/local/bin/dotnet-preview3-dir/dotnet /usr/local/bin/dotnet-preview3
sudo rm /usr/local/bin/dotnet-preview3-dir -r

You can then have a stable binary, and a build version running side by side.

Troubleshooting

One nasty looking error I bumped into was this one, in red, making it extra ominous.

$ dotnet run
/opt/dotnet/sdk/1.0.0-preview3-004056/Microsoft.Common.CurrentVersion.targets(1107,5): error MSB3644: The reference assemblies for framework ".NETFramework,Version=v4.0" were not found. To resolve this, install the SDK or Targeting Pack for this framework version or retarget your application to a version of the framework for which you have the SDK or Targeting Pack installed. Note that assemblies will be resolved from the Global Assembly Cache (GAC) and will be used in place of reference assemblies. Therefore your assembly may not be correctly targeted for the framework you intend. [/home/user/DotNetCore/hwapp/hwapp.csproj]

The build failed. Please fix the build errors and run again.

Let see, its mention Net 4.0, and a GAC< on a LInux bo-x that is running .Net Core.

Not looking good. There are no .Net 4.0 References in the project and the whole point of .Net Core is to stand alone with a dependency on Mono. As for the GAC reference, this message doesn't give is much to go on.

Until you realise all you need to do is restore the project.

dotnet restore

It does show that while the base cross-platform functionality is there, removing the legacy windows reference is going to be some time away for this fledgeling framework.


Using docker cloud can result in a black box experience should something go wrong.

This is especially the case when you provision the node from the cloud UI.

Building a stack with Docker/Dockercloud -AuthorisedKeys however, can get you SSH access, to poke around inside.

authorizedkeys:
  image: dockercloud/authorizedkeys
  deployment_strategy: every_node
  autodestroy: always
  environment:
    - "AUTHORIZED_KEYS=ssh-rsa h38Fh4w89fdlx-s...304KJbhn45=="
  volumes:
    - /root:/user:rw

This will let you add root access via your SSH cert.

Ensure you also open up port 22 on your VM

Once inside, you can take a peek at various logs using a couple of methods.

docker logs containerName
cat /var/log/upstart/dockercloud-agent.log
cat /var/log/dockercloud/docker.log


A recent vulnerability scan using McAfees Secure Scan, one of those automated scans often used for PCI-DSS self certification, advised that the Windows Server in question disclosed the internal I.P. address.

We have run both McAfee's Secure Scan and Comodo's Hacker Guardian. McAfee charges for one I.P. at about USD$300, which is about the price Hacker Guardian asks for about 10. However, McAfee's report is much more thorough, and goes into much more detail into information disclosure vulnerabilities, where as hacker guardian sticks to the standard Mitre CVE issues.

Vulnerability

McAfee reports the IIS information disclosure as follows. This was a Windows 2008 R2 server running IIS 7.5

Threat
Some Web servers contain a vulnerability giving remote attackers the ability to attain your internal IP address or internal network name.

An attacker connected to a host on your network using HTTPS (typically on port 443) could craft a specially formed GET request from the Web server resulting in a 3XX Object Moved error message containing the internal IP address or internal network name of the Web server.

A target host using HTTP may also be vulnerable to this issue.

McAfee gave a link to clear detail on how to resolve the issue, which I later found worked perfectly. though that was no fun, I wanted to see the vulnerability first hand.

Some further digging into the supplied links, and after coming across this kemp article, I found that the issue occurred under the following conditions:

  • HTTP Version is 1.0
  • Host Headers are empty
  • A 3xx Action in Invoked.

Testing the exploit

I started with the following curl command:

curl https://www.website.com.au/ -v -l --http1.0 --Header "Host: "

This was based off the kemp article above, and has one major issue. For an empty host be to send via curl, the header value should be "Host:", not "Host: ". The cURL Man Page confirms this,

However, after adding this the vulnerability did not reveal itself.

The missing factor was outlined in this Juniper Vulnerability page.

This is achieved by browsing a web site using HTTPS, and locating a valid web directory

I first tried adding a folder to the curl request, however forms authentication resulted in every folder resulting in a redirect back to the forms login page.

I then tried a publicly accessible folder, used to store files meant for public access. This gave me the internal IP address, as clear as day, in the location header.

Therefore, 4 conditions were required in the end:

  • HTTP Version is 1.0
  • Host Headers are empty
  • A 3xx Action in Invoked.
  • The URL includes a folder

The final curl command that found it was in the following format.

curl https://www.website.com.au/folder -v -l --http1.0 --Header "Host:"

Patching the Hole

As per the McAfee report. this MS blog page details how to resolve the issues in IIS 7+.

appcmd.exe set config -section:system.webServer/serverRuntime /alternateHostName:"serverName" /commit:apphost

Where "serverName" is what you wish to show in place of the I.P. address.

As it is less than ideal to run a command that patches a vulnerability, without understanding exactly what it is doing, I verified the applicationHost.config, which sits under the %Windows%\System32\inetsrv\config\ folder,

As expected  the following was added to the applicationHost.config file.

<serverRuntime alternateHostName="serverName" />

First AWS summit, and despite being held during the worst storm in Sydney in a number of years, they put on a good show.

Datacom: Cloud & Enterprise Tools

While obviously an opportunity for partners to peddle their wares, they kept this focused on  the methodology and process behind determining what workloads should get moved to the cloud. Using business process mapping to break down legacy software, and breaking down the process to discovery, analyse, mapping, profiling, migrate & integrate, it gave an insight to what goes on behind the scenes of some of the larger cloud migration projects.

Business 101: Introduction to the AWS Cloud

I was concerned this would be a bit too business focused, and leave me wanting more technical details, however while it didn't drill down into the nut and bolts, I am glad I included it as part of my first summit.

While it gave a good overview to all the services, something that would be wasted on a AWS veteran, the case study on Reckon is what gave me the most value in this session.

Breaking down the journey from an on premise, to close to all in cloud company covered a huge range of smaller steps their IT department and company as a whole took. It was presented in a way where they focused on what each step achieved, and left it open to how, and the order in which the audience could follow the process. Including steps such and finding a technical champion, legal & compliance, when to think about moving from AWS business to AWS enterprise support, and the one that stuck with me, implementing a cloud first policy. Workload go in the cloud, unless there is a reason to keep them on premise.

Technical 101: Your First Hour on AWS

This satisfied my technical curiosity, and as someone who started a trial account, firing up a micro instance and then wondering what the hell i was supposed to do now, this session was great in covering going from a new account, to a somewhat hardened, user & group level secure account, while diving into VPC's, infrastructure examples, direct connect, billing & cost management, VM services, all the way though to touching on DevOps automation.

Technical 201: Automating your Infrastructure Deployment with AWS CloudFormation and AWS OpsWorks

This was the one I was looking forward to, and it did not disappoint.

It was a solid segue from the previous session, where once you had dipped your feet into a range of services, it drilled down into their DevOps stack.

As an AWS newbie, the step by step through the whole Cloud Formation & Opsworks DevOps stack was great. Full of solid use cases, and followed up by real world examples, and lessons thanks to Mike Lorant from Fairfax.

The important stuff!

Loot

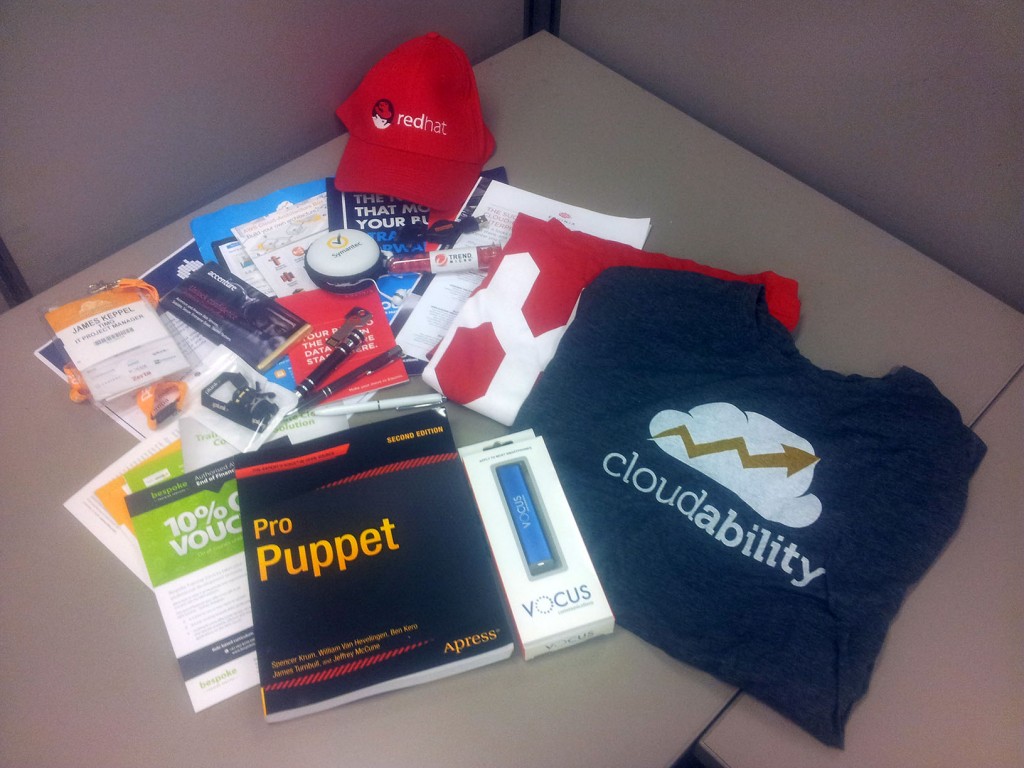
Big thanks to the Puppet booth team for the Pro Puppet book!


While chrome developer tools allow you to test for many http post vulnerabilities relating to invalid post data, testing for a slow post vulnerability needs Googles slowhttptest tool.
https://github.com/shekyan/slowhttptest

The installation in very straight forward
https://code.google.com/p/slowhttptest/wiki/InstallationAndUsage

As the docs say, you'll need lib-ssldev. When missing you'll get:

configure: error: OpenSSL-devel is missing

My LMDE does not have this out of the box, though Synaptic delivered.


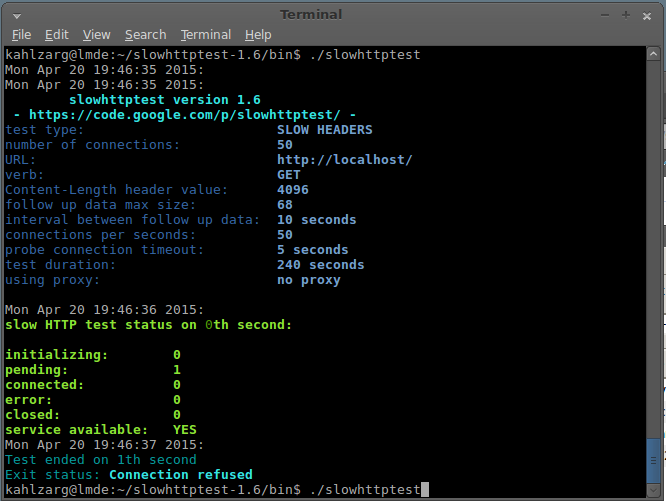
After the make, running slowhttptest hits up localhost by default. Nothing interesting without a local test server.

Shekyan also includes the syntax to launch an example of the SLOWORIS attach to test on your own servers.

./slowhttptest -c 1000 -H -g -o my_header_stats -i 10 -r 200 -t GET -u https://localhost/index.html -x 24 -p 3


With the success on preliminary benchmark on my use case for Elasticsearch . I thought I would see how it ran on a ARM based ODroid U3.

The U3 is a credit card sized mini PC from HardKernel, that runs Android or Linux.

The Odroid U3 Specs include a 1.7GHz Exynos4412 Prime Cortex-A9 Quad-core processor, and 2GB RAM. While it support MMC storage, I'll be using a 16GB Sandisk Ultra UHS I Class 10 SD Card, in part to makes things interesting, and in part so I easily swap out my Android XBMC MMC between projects.

I have gone with Ubuntu 14.4 from the ODroid forum site.

Oracle Java 8 via apt-get was straight forward, however elasticsearch via packages.elasticsearch.org did not explicitly support armhf.

I added the following to /etc/apt/sources.list as outline by the docs

deb http://packages.elasticsearch.org/elasticsearch/1.5/debian stable main

However apt-get update gave me the following error.

W: Failed to fetch http://packages.elasticsearch.org/elasticsearch/1.5/debian/dists/stable/Release  Unable to find expected entry 'main/binary-armhf/Packages' in Release file (Wrong sources.list entry or malformed file)
E: Some index files failed to download. They have been ignored, or old ones used instead.

As Elasticsearch runs in Java, I figured running the x86 version would be fine. Just needed to figure out how to do it.

After hitting a dead end after editing /etc/dpkg/dpkg.cfg.d/architectures, I tried adding architecture tags to /etc/apt/sources.list as outlined in the Multarch/HOWTO.

deb [arch=amd64,i386] http://packages.elasticsearch.org/elasticsearch/1.5/debian stable main

Worked a treat, package sources updated, and elastic search installed as a deb package.

Like any software raised on linux, even where it runs under a JVM like Elasticsearch, running it on windows bring to light a few quirks.

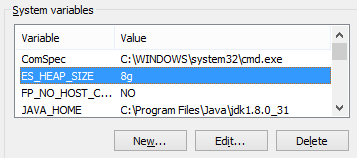
One of the most common Elastic Search Environment Variables is ES_HEAP_SIZE, shown in the System variable panel below.

With the default set to 1GB, setting this is often done early on, though note the following 2 gotcha's in windows.

  1. After you set the ES_HEAP_SIZE, you need to re-install the service. Restarting ES won't do it.
  2. If you are restarting the service from the command line, remember to open a new CMD window after setting the Environment Variables, A stale window will hold the old value, (or have none if none was set) and restarting the service in that cmd.exe session won't update the heap size.

Here is how you can ensure that your Environment Variable took under the JVM section via /_nodes/stats?pretty=true

Also, remember to not cross 31Gb!

http://www.elastic.co/guide/en/elasticsearch/guide/current/heap-sizing.html

Azure Web Sites support IP restriction in the web config, as demonstrated by Stefan Schackow's MSDN Blog.

I then add the following to my web.config

While this works great for Azure, for local builds, you may encounter:

HTTP Error 500.19 - Internal Server Error

The requested page cannot be accessed because the related configuration data for the page is invalid.

Module IpRestrictionModule
Notification BeginRequest
Handler ExtensionlessUrlHandler-Integrated-4.0
Error Code 0x80070021
Config Error This configuration section cannot be used at this path. This happens when the section is locked at a parent level. Locking is either by default (overrideModeDefault="Deny"), or set explicitly by a location tag with overrideMode="Deny" or the legacy allowOverride="false".

The culprit was the snippet at the bottom of my applciationHost.config

<location path="" overrideMode="Deny">
  <system.webServer>
    <security>
    </security>
  </system.webServer>
</location>

Commenting out the entire location tag resolves the issue.

Microsoft Azure has successfully lured me in with their promises of a VS2014 CTP VM.

Recently completed MVC training was my first introduction to Azure, so outside a learning environment the VS CTP was a chance to dust off the account.

Trial Account & Credit Card Registration

While I was hesitant to hand lover my Credit Card number, expecting the usual incurred charges if you don't cancel, Azure surprised me with being up front about what my next bill would be, and that it would be 0.00

AzureBill

Having that on the first page that opens when I click on billing, is transparency that will go along way with those who are less trusting of cloud computing.

Spooling up the VS 2014 VM

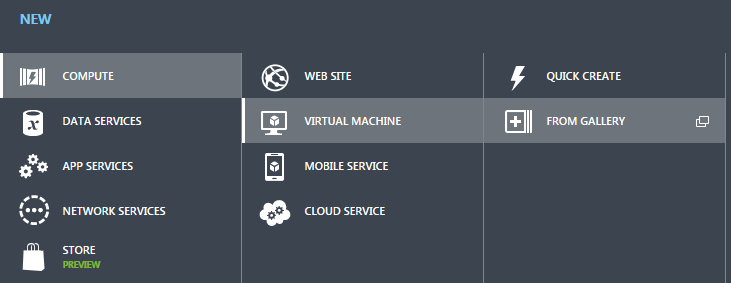
All very straight forward, select add, and select VM for Gallery for existing images.

AzureVM

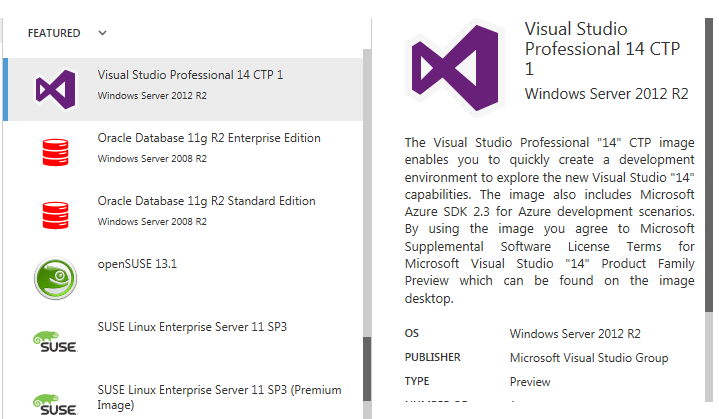
Select the VS2015 CTP

AzureVS


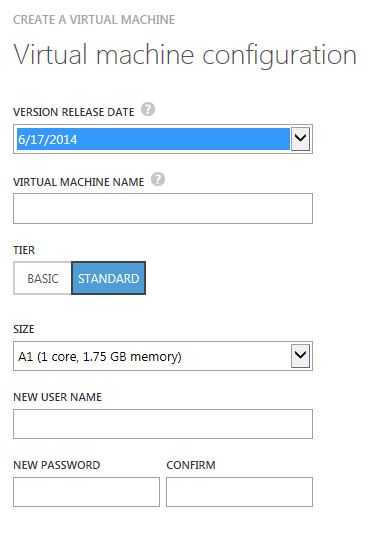
Minimum required info to get me started... not bad.

AzureConfig

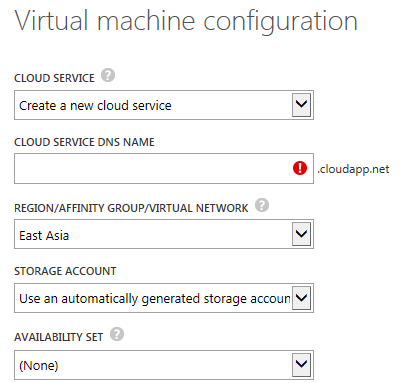
AzureNetConfig


Now if this is your first VM, note the Cloud Service DNS name will be reused for all VM's.

Remote Access to your VM

Under endpoints check the RDP public port. This will access your machine via NAT.

AzureEndPoints

RDP into <CloudServiceDMSName>.cloudapp.net : 59276 (in is case), and you're in.

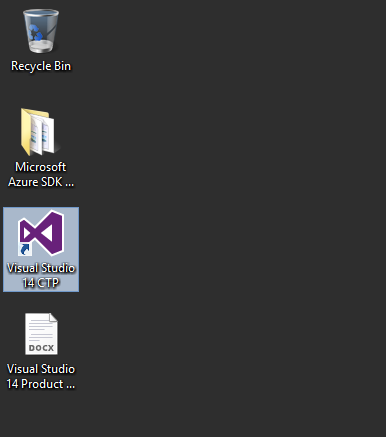
AzureEndPoints AzureDesktop

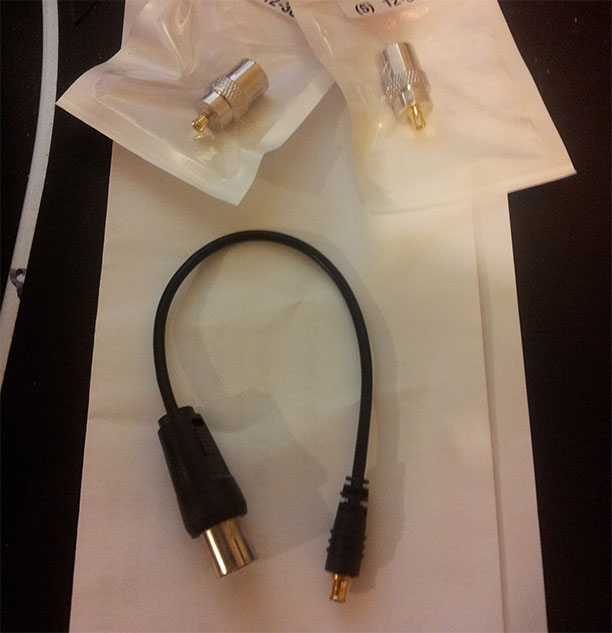
After a long wait, and a missing, though refunded shipment from one vendor, I finally received 4 MCX to Co-Ax Converters from ebay.

Not willing to wait after the first AWOL shipment, I ordered 2 flyleads and 2 one piece converters.

20140623_212910_

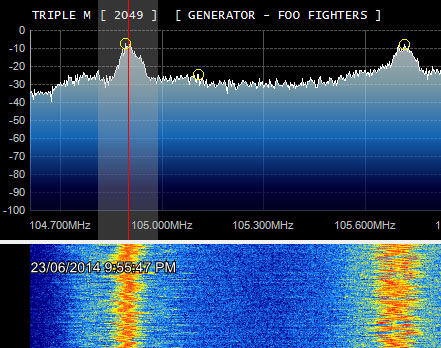
The difference in FM radio off the bat was huge. With a slight adjustment of the AF gain and setting Noise reduction to -75db, the signal was crystal clear. SDR# also picked up the 64 Character Radio Data System message, though that come through at a character or two every second.

TripleM

Next I'll be seeing what luck i have getting anything of substance from Bankstown Airport traffic control.